Search

Showing posts with label cold process soap. Show all posts

Wednesday, January 4, 2012

Cherry Blossom & Kismet

I managed to get into the kitchen for long enough yesterday evening to cut the two loaves of soap you will have seen in the last video ... and then I made a video about them! So here are Cherry Blossom (a floral bouquet of cherry blossom, regal iris, jasmine, rose, lily of the valley & soft freesia on a base of musk & deep amber) coloured with pale pink, pale green and white and Kismet (a blend of patchouli, orange, lemongrass, lavendin, pine, gardenia, sandalwood and musk).

If you watched my other videos, you'll know I was worried that Kismet would be full of mega air holes as the soap set up so quickly on me - this one's a mover (and I didn't use any water discount or anything, full water, cool temperatures etc), but it worked out really well .. a couple of air holes here and there, but hey, don't they help the soap to breathe right?

For the cherry blossom, I wanted to make something that reminded me of my Mother ... not old fashioned or anything but as cherry blossoms were her favourite tree, I just wanted to make something that brought me the feelings I have when I remember her.. hope that doesn't sound to sappy!

Anyway, enough writing... here is the new video.. enjoy!


If you can't view the video directly here, the direct link is http://youtu.be/42Z5psWn2t4. 

Tuesday, January 3, 2012

Another Video of New Soaps

I've been in a soap making frenzy this last few days and, as I was finishing up my Pink Sugar/Vanilla & The Browning Effect video, I showed a few more soaps I'd made as well.. two lots already cut up and two lots just out of the fridge and waiting a day or two to be cut.  I thought you'd like to see so here you go:


Enjoy! I'm hoping to cut the other two logs this afternoon (once the kitchen is free) and then I might take another video of them too.  Here's the You Tube link if you can't see the video, for any reason http://youtu.be/Z19CDfau7MU.


Monday, January 2, 2012

Pink Sugar & My Vanilla Movie

Hi everyone! I'm back soaping!

I was in a soap making frenzy these last few days and I made a fabulous Pink Sugar soap.  This fragrance is sweet and sexy at the same time, it's described as having base notes of candy floss, caramel, toffee, and vanilla that mingles with middle notes of fig, strawberry jam and violet musk. The fragrance is rounded off with top notes of lemon drops and sweet brown sugar.  It's a stunning fragrance and I've so wanted to soap this for an age.  


Plus, making this soap gave me an opportunity to make a video that I've been thinking about for a while... some vanilla based soaps can naturally turn the soap brown (due to the natural vanillin in the fragrance) and I thought I'd make a video that showed this progression from just made soap to the dark brown colour. So here it is, hope you like it...


For those who subscribe by email, I know you can't see the video, so here is the direct link to You Tube http://youtu.be/ZZ9Y9njpOS8.  


Monday, August 29, 2011

New Video - Cutting of Jasmine & Green Tea

My second venture into the world of soap video making ... this is me, cutting my latest soap, Jasmine & Green Tea. 

Check out this baby!  She is a beauty - a blend of jasmine & green tea fragrance oils, the jasmine adding a heady exotic floral note and the citrusy green tea a wonderfully refreshing note.  All made with our usual blend of sweet almond, golden olive and avocado oils with lots of cooca butter and, of course, pure wild silk.  Sheer luxury!!!


This will be fully cured by 10 October - drop me a line at info@soaperstar.com if you're interested in pre-ordinerg some. 

Wednesday, August 24, 2011

Laundry Day - Cut Pictures

Well, you've seen the picture and small video of the making of this, the cutting video and now, here are the cut pictures.  This is the most photographed soap I've ever made... a total movie star!

Laundry Day - a clean, fresh, comforting fragrance that reminds me of freshly washed laundry blowing in a summer's breeze or the fragrance when you snuggle up into a freshly changed bed.  I love it, it's soft and clean and just wonderful.

Hope you like the pics!


If you're interested in pre-ordering one of these, just drop me a line at info@soaperstar.com - they'll be fully cured by 5 October. 

All images copyright @ Soaperstar and Taken By Titch, 2011. 

Tuesday, January 25, 2011

Soaping Fairies and Saving the Day

I haven't been too well lately, suffering from extreme tiredness - I've had a few days off work to rest and relax and decided I'd make a soap to help me de-stress.  I had in mind a nice swirl maybe (I always have this in mind, it rarely actually works that way ... is this going to be any different?!) and wanted to work with the Pomegranate Noir fragrance oil I've used many times before in body butters and my glycerine soaps.  It's a lovely fragrance, deep but beautifully scented.  It's also really popular with men and women. 

So I decided to make a nice cold process soap with Sweet Almond Oil and Cocoa Butter plus add my favourite pure silk to it as well ... then maybe a dark pinky swirl (thinking of the pomegranate element) and a deep dark blue swirl (to illustrate the depth of fragrance) alongside pure white soap.  So I weighed and checked everything, double checked in fact.  Weighed out my water and my lye (I was tempted to reduce the water level a little but then thought best not to since I was going to try and swirl).  Did everything the way I've done it before and it's all worked fine.  The only variable was the fragrance oil which I'd not used in cold process soaps before.

Everything went fine ... I mixed the fragrance oil with the now liquid oils and butters and mixed it all thoroughly in; then added the lye and wham bam thank you Ma'am, it was seize city! I mean whoooooo hoooooo.... ricing too, lumpy bumpy.  I beat that thing, beat all the ricing out of it and thought, to hell with it, I'm going to do my damn colours anyway, so I poured my prepped titanium dioxide in the batter, stick blended it as much as I could, then poured (or glopped in reality) some of the batter into my pink and some into my blue colours.  Then beat it again because it was starting to rice and sieze and then glopped the white into the mould, then glopped the blue, more white and then the pink and the last tiny bit of white on top.  Banged any air bubbles out of it and hoped for the best.  It looked like creamy semolina at this stage.  Hubs was around and helped out by carrying it upstairs to the spare room which is a sort of soap airing room now. 

So I tidied up (I was literally in a sweat now cos I did all that in milliseconds, rushing like a crazy thing - isn't soaping meant to be relaxing??) and sat down - I have to say it didn't help my exhaustion! Then I decided I'd have a peek and take a photo anyway.  Oh my Lord, this is what I saw:

See the granulation and the pools of oils on top?

This picture shows the pool of oil on the right hand side of the mould

This isn't what it should have looked like at all - I wasn't happy! Fearing it was incorrectly mixed lye (but thinking it couldn't have been either because I stick blended that thing to within an inch of it's life) I checked and found it was definitely oil but didn't want to find out if it was fragrance oil (by tasting) because I'm not that brave.

I went online to my soaping buddies and was advised to hot process it in order to able to save it.  As I put it in the crock pot, I had to scoop it out of the mould and found it had seperated inside also so it was definitely a goner unless I HP'd it. 

As it was cooking, we discussed it online and the consensus was that the fragrance oil heated up the batter so much that was already gelling in the bowl and that it was seperating or leeching out oils - this one is obviously one to HP from scratch.

So I HP'd it and, though it ruined my nice layered effect (which, as I dug it out of the mould to put in the crockpot, I was happy to see that it actually looked really nice), and blended all the colours into one, it certainly made for a nicely smooth soap.  I was pretty happy with the end result and it does smell pretty good. 

In the mould, just at the end of cooking

Cut pics, it was only after that I thought I should have dusted the tops with some mica

Pretty smooth side for HP soap (which can look rather rustic at times)

Finished article

So the moral of this story is that, when something goes wrong and you're sure you've done everything right, HP your soap in order to save any waste ... plus maybe test new fragrance oils on a smaller batch first!

If I had a stamp, I think a stamp and some mica would really bring some life into this soap - I don't though! It does smell really good though and I'm growing to like HP more and more!

Monday, January 17, 2011

Lemon Cream & Green Tea Cut pictures

I promised you some cut pics of the Lemon Cream & Green Tea soaps - sadly I cut too early which has annoyed me a lot but it's all a learning experience.  This makes NO difference to the quality of the soap of course, it just means my designs would be clearer and the soap smoother in appearance. 

The time you can cut a soap is dependent on a lot of factors - your recipe, the outside environment (drier means you can cut earlier, damper, like it is here at the moment, you need to leave it longer, whether you gel the soaps or not etc).  I don't gel and I cut only a couple of days after making the soap - in reality, I should have left it for a week and then cut it. 

Lemon Cream - scented with Lemon & May Chang Essential oil:

Sprinkled with poppyseeds

You can see the subtle swirls of white against yellow soap - if you look at the previous picture, the yellow was so vibrant and now so pale.  You can also see that the poppyseeds get everywhere which drove me nuts!


Green Tea - you can see the slight drag due to cutting too early; its an incredible fragrance though, I just adore it. 

I'm going to leave the soaps to cure and possibly trim them on a beveller (as I'm looking into ordering one) to tidy up the final soaps. 

Saturday, November 20, 2010

I broke my HP cherry... well, my berry really

I had it in my mind to make a cold process soap today.  I worked out a nice recipe with Sweet Almond Oil, Cocoa Butter, Palm Oil, Coconut Oil and Castor Oil (for the bubble factor!).  It was a lovely blend, nicely balanced between hardness, conditioning, bubbles etc etc.  I worked it all out on Soap Calc (for those who read this but don't make soap, Soap Calc is a calculator that helps you work out the correct amounts of oils/butters to use with the correct amount of lye so that you get full saponification - the chemical reaction between the fats and the lye that makes soap ... end of chemistry lesson!). 

Then I thought, I wanted to do something maybe pink or purple and maybe a berry fragrance but it's nearly Christmas so maybe something with a bit of spice too? So I raided my cupboard and found some Forest Fruits fragrance oil and blended this with a Ginger Spice fragrance oil - hubs, as usual, smelt it and agreed it was lovely and thought it rather a masculine blend (I suspect that was more the "out of bottle" fragrance rather than the "in use" fragrance, however). 

So, I got to work .. weighed out my hard oils and melted them, added to my fluid oils.  I decided to use some Titanium Dioxide to make the base soap whiter so mixed a little with some of the oils and added the mix back into my oils.  I weighed out my fragrance blend and added that to the oils too.  I'd made up my lye with my added silk and it was cooling in the sink, coming to the right temperature for me.  I put some Raspberry and Grape POP micas into two seperate cups and put them in front of me so they'd be close at hand when I was ready to go.

I put everything together on the work top and checked my stick blender was working ... and then got to work, pouring the lye water into the oils and stick blending to a light trace.  I mixed a third of this base batter into the pink, and another third into the purple and mixed them both carefully.  Then I did a nice in the pot swirl and poured everything into my new silicone mould.  All jolly fine, I was happy (wish I'd used more colour but I'll know better next time). 

I carried the mould carefully upstairs to the spare bedroom aka the soapy studio and thought, as I was walking downstairs "oh, this'll be really nice with the cocoa butter in it".  And then thought, "hang on, what cocoa butter??".  ARGGHHHHHHHHHHHHHH, I forget the cocoa butter!!! I never even weighed it out, I just totally forget it!!! Damn!

So what now? Well, as ever, after complaining a lot and feeling very rubbish and moaning at myself, I jumped on the net and asked on my favourite soaping forum "what do I do now?".  The answer was, if it's not fully set, melt the cocoa butter and stick blend it in.  Ugh, I'll lose my swirls.  If it was too hard, I could hot process it.  Now, seeing as I bought a crockpot (or slow cooker, which is the same thing) last weekend I thought, why not.  It's like the God of Soap was telling me to do it, go and try hot process. 

So I went and got the soap, turned the crockpot on and scooped all the soap into the bowl.  Yes I lost the swirls but I was doing something new so that'd make up for them.  So I let the soap cook as I went to melt the cocoa butter.  I also mixed a little extra grape POP mica in a cup with a little extra Sweet Almond Oil and a tinch extra of the Ginger Spice fragrance oil because, when I had mixed everything in the crockpot, it was a rather grey sludge and I wanted to try and keep at least some of the berry effect going. 

So it cooked; I left it for about an hour, stirring a little in between.  I tested the soap for zap about half way through - it's a very good way of learning what zap feels it! Boy, it did zap on me.  I cooked it a while longer and tested again - about 50 minutes in, it was pretty well cooked through, but I left it for another 5 minutes, just in case.  I then took it off the heat and added my purple fragrant oil mix and mixed it fully through the grey sludge of hot soap.  It was a really nice purple colour now and smelt fabulous - like hot spicy jam or something!  With the help of hubs, I glopped it in the mould (there's not much else you can do with HP soap, it's not as fluid as CP, glopping in the only choice really). 

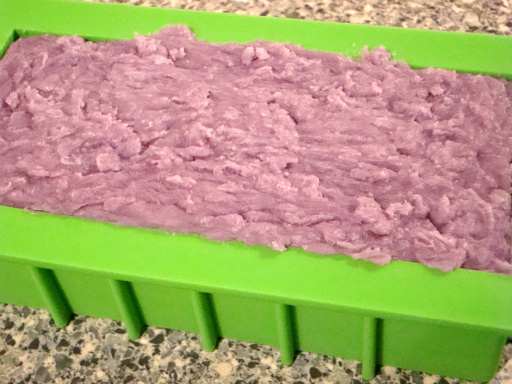
So, here is my first hot process soap sitting in my new Crafters Choice silicone mould (yay no lining!!) .. I'll post cut pictures tomorrow to show you how it worked out.  Oh and I believe you're supposed to put a lid on and weigh it down which helps to compress any air bubbles out and makes for a smoother soap but I didn't have a lid and couldn't find anything to put on top that fit the aperture exactly ... so I didn't!


Hope you like it - more pics tomorrow.

Thursday, November 18, 2010

The Minted Swan

Last Friday, I decided to make a new cold process soap.  I wanted this for some presents and wanted a totally essential oil based soap too.  I also wanted to try out my new Olive Pomace oil that a friend of mine kindly brought back from the UK for me (he was paid in soap, of course!) and I wanted to do some type of swirl pattern in it.  I mostly make glycerine soaps and I love love love doing swirls with them (it's my "thing") so I thought it was high time I tried a cold process swirl too. 

I used a blend of Olive Pomace, Coconut, Palm (from a sustainable source of course) and Castor oils, added pure silk into the lye water and some water based titanium dioxide as I wanted a nice white colour in the swirl too.  I melted the coconut and palm and then added them to my liquid oils.  I mixed up some green liquid colour in a cup, and some green mica in another cup.  Measured out my essential oil blend of Peppermint, Spearmint, Eucalyptus and Rosemary and kept that close by on the work surface. 

I blended the lye water into the oils and stick blended until I reached trace.  However, I was somewhat worried that I needed to keep the batter more fluid to allow me to do an In The Pot (or ITP) swirl.  I poured a third of the batter into the cup with the green colour, a third into the green mica and left a third in my original bowl.  I mixed up both the colours and then poured them, from a height, into the white soap base.. gave one or two turns of the spatula in the bowl and then poured it into the waiting mould.

At the end of the bowl, however, there were some bits that seemed to look a little curdled - like the way your milk goes in tea if it's a little off.  Not all of it, just some.  I was worried then that I hadn't stick blended it sufficiently well to have the lye fully incorporated.  I tried to do a dusting of mica on the top but that didn't work out so well (a little clumpy if truth be told). 

So I left it in the mould and popped it in the fridge (I always do).  I got online and asked the experts on the various forums I'm on about the curdling.  After much whining by me (I'm a little OCD when things go wrong because I have to dissect what happened into tiny little bits so I can fully understand WHY so it won't happen again).  The advice given to me was leave it for a week and see.  Now, anyone who knows me knows that patience is not one of my virtues.. in fact, if I found a store that stocks it, I'd probably still not buy any! The thoughts of leaving it for a full week drove me nuts!

So, I poked and prodded at it the rest of the day (you knew I would didn't you?!) and then left it alone.  Next day I decided I'd take it out of the mould and, at least, it stayed whole.  That's a good thing.  Then, later on, I got all curious again and went and cut it in half! I did a zap test and ZING, ZAP! Eeeekkk the thing nearly electrocuted me! I thought it was a goner.  Went and reported my dead tongue to the forum regulars and they said, again, LEAVE IT ALONE AND STOP MESSSING WITH IT.  Ok, ok.. I'll leave it.. grumble, grumble, grumble.

So, now I decided I hated it anyway cos it obviously hated me and so I left it.  Fine, sit in the corner for all I care.  I hate you now cos you hate me.  Fine.  And so it sat, under a piece of kitchen paper .. lonely, zinging and zapping away.  Even though it hated me, I still thought it smelt pretty good. 

So, I left it.  For a week.  A week is a long time in my head, I forget lots of things in a week.  I forgot the ugly soap.  But, tonight, I remembered.  And I checked on it.  And it had grown into a swan!

I did a zap test, no zing, no zap, I still had a tongue.  I took it downstairs and made my husband (who was quite happily relaxing in his armchair watching TV) get up and look at it, made him do a zap test (yeah, that's love, a man who'll taste your soap to see if it electrocutes him!) and nothing, no zing, no zap.  He did it three times, I did it twice.  I was all excited, it was Christmas come early.  So he cut it for me ... and then I took over cos he made some pretty crooked slices of soap! And I cut it nicely into eight and tidied it up a bit (he'd done something odd when he took the blade away from the soap and it had taken tiny chunks away with it... men!).  And I looked at it.. and it was, indeed, beautiful! What a soap! What a save! My lovely Minted Swan. 

I present her beauty to you:

Soaping tornado!


I hope you like my Minted Swan as much as I do!

Sunday, October 31, 2010

Winter Wonderland - Adventures in Soaping

Well, I've not made soap in well over a week and I was having withdrawal symptoms.  Also, hubs and I have had a very tough week this week plus I had a soaping competition entry to make so, when I woke at 8.30 am on Saturday, unlike most sane people in the world who turn over and go back to sleep, I got up and made soap!

The competition's theme is "Winter Wonderland" and I firstly did some research on Facebook and asked everyone what they thought when I said Winter Wonderland.  Out of the tons of answers, there seemed to be two themes - red/gold and spicy and white/blue/silver and fresh, minty fragrances.  Initially I tried the gold and spicy view which was lovely but didn't say Winter Wonderland to me.  Regular readers will have read about my recent Orange Spice cold process soap.  So I decided I'd try my hand at the white/blue/silver look.

I checked online and found a fabulous new fragrance oil I'd not tried before - it was a US one (which I can't use for items for sale due to EU regulations but I can use for personal projects) that I loved the sound of (it's described as having top notes of eucalyptus, spearmint, wild rose and dew fresh ferns leading to snow pines, blue jasmine magnolia and white lilies finishing with a base of white musk, balsam and sandalwood).. no idea how it would perform and despite posts on an US based soap forum, nobody could tell me. A universally untried fragrance, oh I am brave!  You may know that some fragrance oils (and essential oils too) can react with the lye in cold process soap and start the whole saponification reaction (the chemical process where fats are turned into soap due to the reaction with lye) very quickly ... so you can end up with, literally, soap on a stick!

So, I set up everything ... weighed out my lye and water and made that up, with added silk for a luxury touch.  Weighed out my hard butters/oils and melted them and poured the whole lot into the fluid oils.  Mixed my titanium dioxide (a colouring element that helps the soap stay nice and white - some soaps will naturally be shades of cream, yellow or green depending on the base oils used) and keep that close by me.  Put my fragrance oil beside it alongside the bottle of blue cosmetic colour.  One of the most important things about soaping is to have everything ready, to hand for when you need it ... it's a really BAD idea to forget something and have to go running as your soap is beginning to set on your stick blender!

Anyway, I got everything all ready and sorted, nicely prepped. I wanted to do a pale baby blue and white soap and I had imagined maybe a nice delicate swirl or two.  I checked my temperatures were ok, added the fragrance oil to my oils and poured my lye/silk water in.  I mixed a little with a handwhisk and then mixed with the stick blender.  All as usual up til now.  But then, Oh Boy. Can we say the thickest of thick custard in a world of the thickest custard you've ever imagined? The stainless steel bowl I was mixing it all in even felt hot! The soap was setting up quicker than anything I've made to date. 

So, I decided, that it wasn't going to beat me! So I stick blended it until I was sure everything was well mixed (including the titanium dioxide) - now we were at the mega thick custard stage! I then added half of the now white soap batter to a bowl with 2 drops of blue liquid colour and mixed that with a spatula. The white was setting up fast and furious, the now blue soap was doing the same - I had sweat on my brow! So I had to drop portions of blue and then portions of the white soap into the mould and then banged the mould on the work surface about 15 times (I'm sure I woke up everyone in the house at that stage!).  I had to make sure that I got everything in the corners and leave no air pockets.  I then layered the last of the blue and white (really mega thick by now) on top and swirled them as best I could with my spatula.  The last thing I did was generously dust it with sparkling silver mica to represent the crisp ice sparkling in the sunlight.

I fully suspected it wasn't going to work and it would be back to the drawing board for this one.

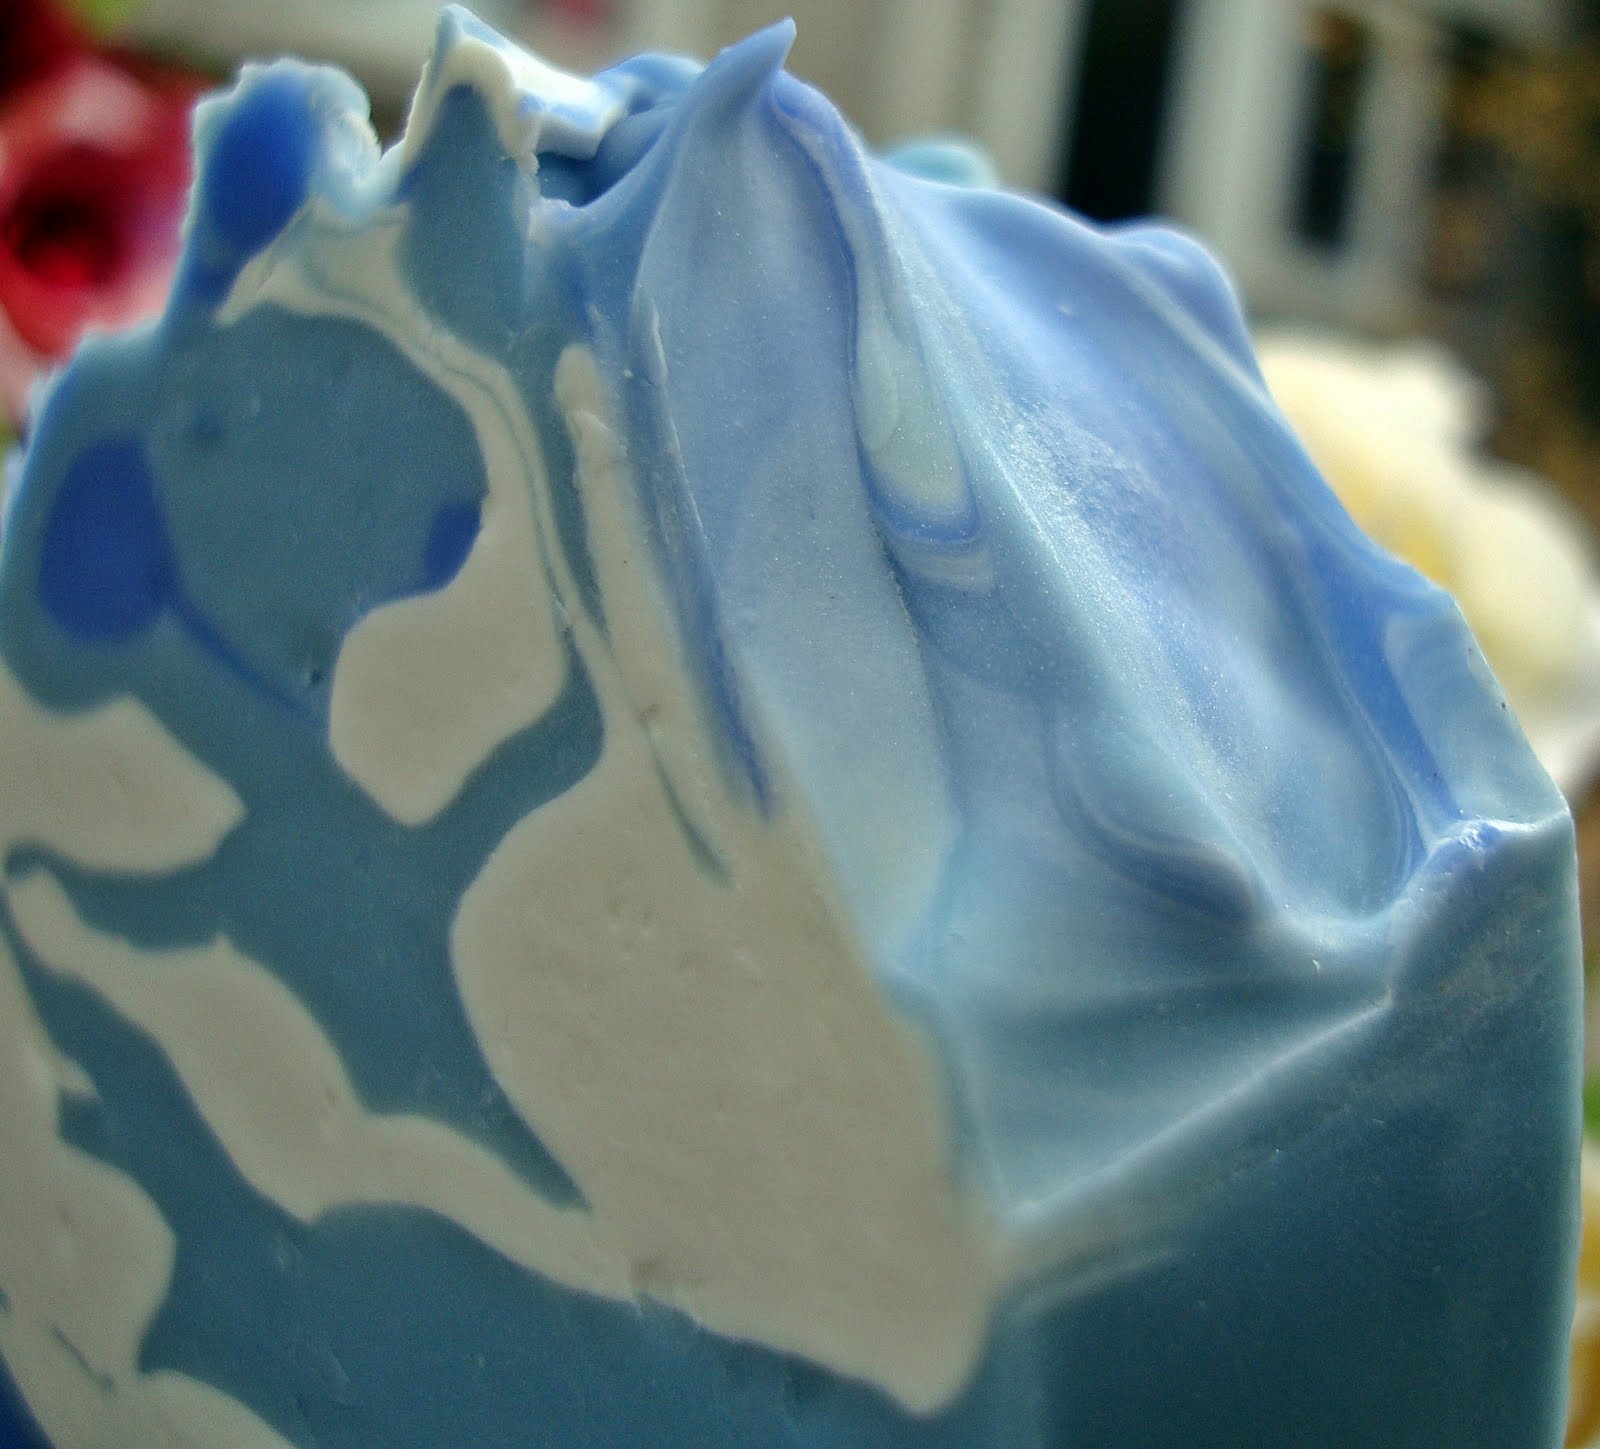
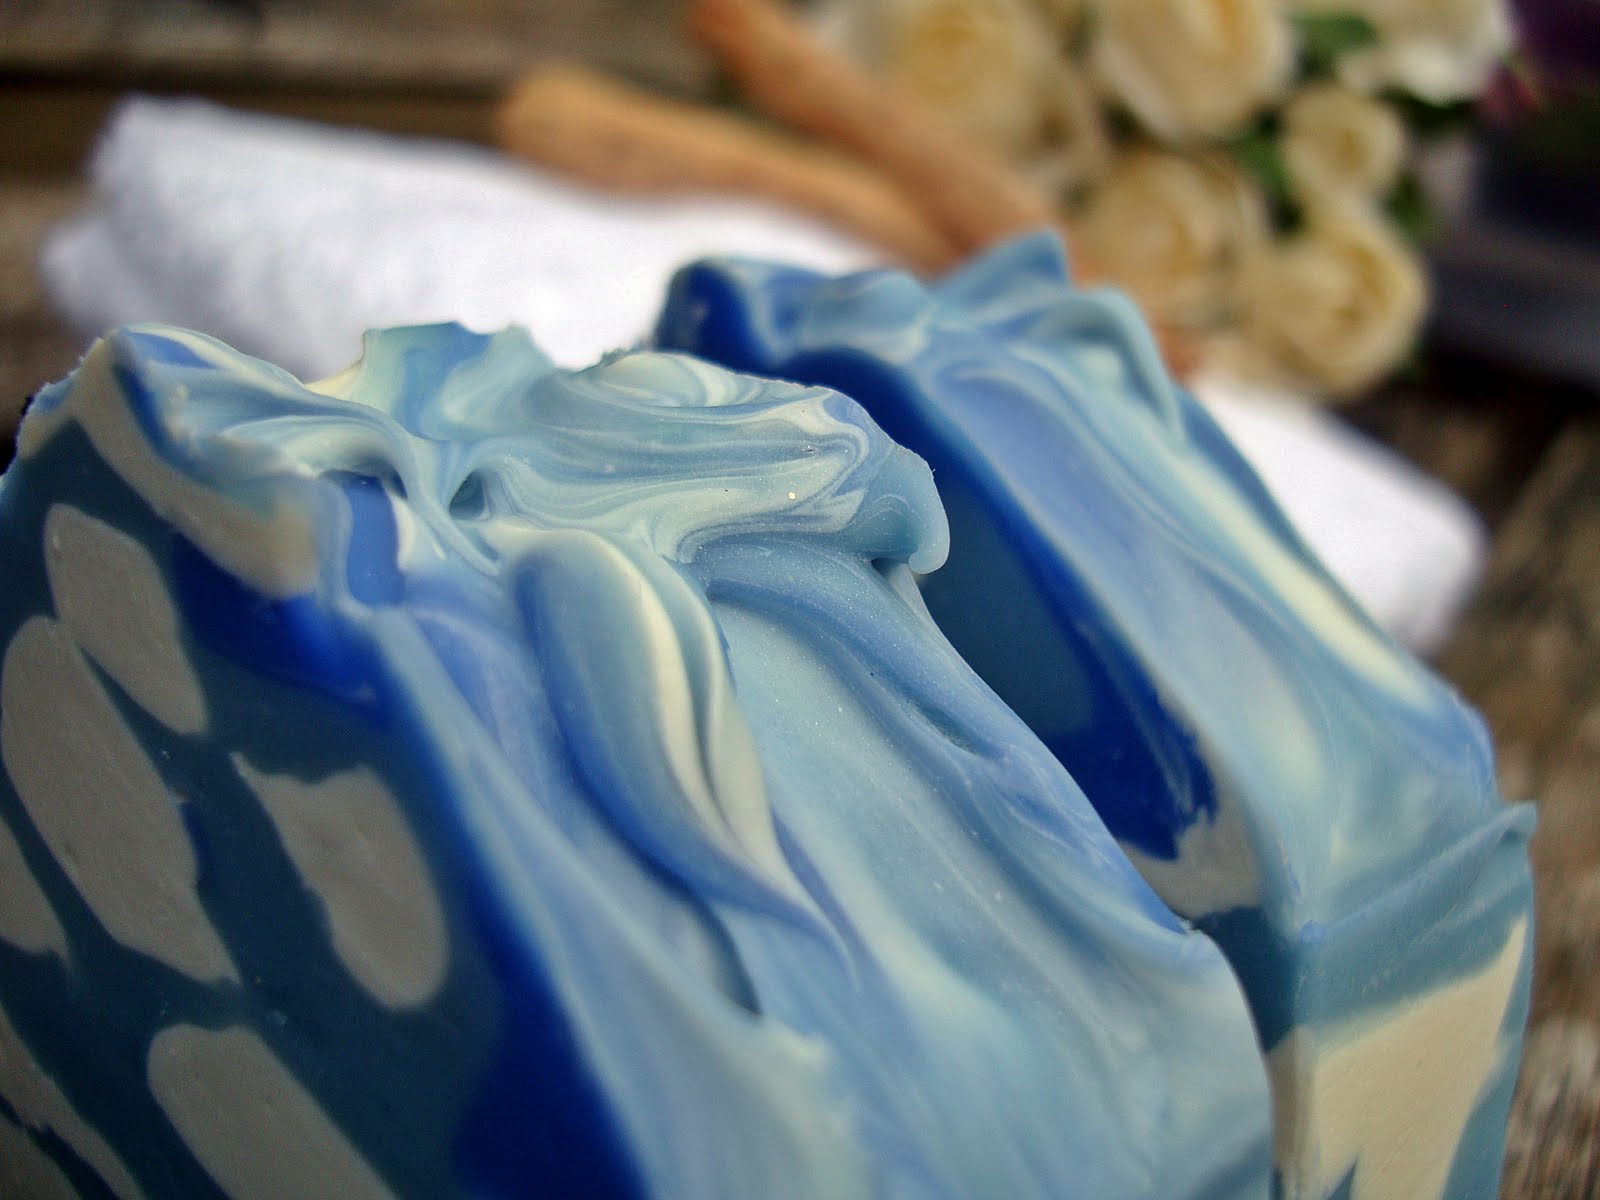
However...... I got up early on Sunday morning too and decided to cut it and see.  And what did I find? One beauty of a soap! And one that, I think, says Winter Wonderland to me far more than some wispy swirls do.. I wanted something reminiscent of the cold, fresh air the hits your lungs when you walk out on a snowy Winter’s day and I think this one achieves that nicely – it smells so much of clean, fresh air, and it is almost icy.  I think the blue/white pattern is reminiscent of a glacier in wintertime.

Personally, Winter Wonderland says snow topped moutains, that crisp crunchy sound of the new snow underfoot and the wonderful scent of fresh air, pines and, ultimately, a clean cool peacefulness.

So, for your visual pleasure, I present my Winter Wonderland:

The blue swirl looks like a ski slope!

I just love the silver mica glistening against the blue and white top - so reminds me of Winter

This is the soap straight out of the mould - a few air bubbles from the speed of trying to get it into the mould!

The competition is being sponsored by http://www.creativesoapweek.com/ and details of the competition can be found at http://www.creativesoapweek.com/contest-for-creative-soapmakers

Voting begins on 16 November and I'll be doing a new blog post then to ask you all to vote for my soap, if you don't mind that is!

I'd really really love to win this - not because of the prize but because I've only been making cold process soap for less than two months but researching it for far far longer and I'd adore it if my soap, the one I worked long and hard to make and which I had to beat into submission and won, actually won! It'd be such a lovely recognition for me!

Thanks for reading ... as ever, if you'd like to comment, please feel free. 

Monday, October 4, 2010

Mintilla (aka Sweet Mint)

I promised you cut pics! And I deliver! But I decided a nicer name for this soap was Sweet Mint - my husband said Mintilla sounded a little too much like a Japanese Mint flavoured monster (Mintilla - Godzilla - get it?!).

So, for your soapy visual delectation, cut pictures of Sweet Mint:

Just straight out of the mould

Cut Picture No. 1 - cool white and minty green - perfect Mint & Vanilla colours

Cut Picture No. 2 - I love the swirls but the crumbly-bum annoyed me (yes, I'm very picky!)

I love this - so white and minty coloured - perfect colours for the fragrance blend

Bubbles!!!

I love this fragrance and it'll be interesting to see how it lasts during cure.  The recipe was mostly hard butters/oils which is why it set up so quickly (nearly ended up with soap in a bowl!) and why I got the crumbly-bum on the end of the slices - no matter, I know how to remedy that. 

Hope you like the cut pictures - really loved making this soap and the fragrance is just beautiful!


Thursday, September 23, 2010

New cold process soap experiment

So, I had a day off and decided that I'd make a new cold process soap - I'm still experimenting to get a perfect recipe but used one I'd already tried out because I wanted to practise with some additions too.

I was sent some tussah silk and some titanium dioxide along with a gold mica, by a fabulous soaper friend of mine.  Silk adds a huge luxury factor and makes the soap feels so smooth and luxurious (check out some of the really high level brands of cosmetics, they often have some form of silk in them).  Titanium dioxide is a natural white powdered pigment that helps you achieve a white white white soap - it can create more heat though so it can be tricky to work with.  Finally the gold mica ... ahhhh, what can I say? I must have been a magpie in an earlier life because I do love the glistening shiny things!

I choose a recipe with Cocoa Butter and Apricot Kernel Oil - both fabulous for your skin and both light coloured oils to help keep the colour of the final base oil whiter too. 

I decided to use a Vanilla fragrance oil - vanilla based oils can be problematic as they often make the soap turn brown but I used a specifically designed non-discolouring version so my soap will stay as white as it is supposed to be.


Not the best picture in the world, I will admit that but you can see how creamy the colour on top is... why is this, I hear you say, when you wanted white soap? Well, here's the thing.... the gold mica was calling me and I thought why not do a lovely sprinkle on top of the final soap.  Great idea! Yes, good idea when it sprinkles but not when it clumps! So I decided to swirl it and colour the very very top layer of the soap - it created this delicious creamy looking top, I love it.  I'm hoping some of the glisten may show but I'm doubting it.  You can see from the blob on the bottom edge of the mould how white that base soap is.  Now, one of the problems with using Titanium Dioxide (or TD) is that it can produce a crackle effect - this can be due to overheating issues and TD can be the cause of that at times.  We'll see when it's cut!


Now, here's a problem ... a tiny crack.  I am showing a close up on this but it's not huge, if you were to cut the soap, it'd be the width of one bar.  The crack can be possibly caused by a little bit of overheating - the soap was kept in the fridge for a few hours to help keep the temperature down.  As I said, the TD may produce a crackle effect and the heat produced could mean that I won't have the perfect white soap either. 

Tune in for cut pics in the next few days.  I will say, it smells damn fine!!!

Tuesday, September 7, 2010

Geranium & Ylang Ylang - new cut pictures!

You'll know that I've slowly ventured into cold process soapmaking in the last few weeks - I'm really enjoying it a lot! It's different from my usual method of soaping - glycerine soap - in lots of ways but I find some of the techniques and experiences are transferrable.  For instance, a key thing in any soaping of any kind is prep work ... get all your ingredients weighed and set up, ready to go, so that you're not running around trying to remember what goes where when you're up to your elbows in soap!!!

On Friday evening last, I made a Geranium & Ylang Ylang cold process soap - this one contained Sweet Almond Oil and Cocoa Butter, amongst other things.  I also added a little pink clay but I don't think you can see this at all so I think I probably needed to add more.  Here's a picture of how it looked in the mould, just after I swirled.


And here are the cut pictures - 4 days after they were made.

Straight out of the mould - see how much the colour has changed?
 
Cut soaps - lovely, swirly tops

Two colours were used - you can see the brighter pink just at the edge of this soap

More swirly tops!

Side view - smooth soap

More swirls - don't they look a bit like caramel shortcake?

Final pic - making soap balls with the leftover trimmings - niccceeee bubbles baby!

So, that's my latest - now I'm thinking what else I'll make.... ideas on a comment please!!!


Sunday, September 5, 2010

Amber Vanilla ... I am in love!

Following on from yesterday's post, I'm posting cut pictures of the Amber Vanilla soap I made on Friday 3 September.

Here's how it looked in the mould (apologies in advance for the terrible picture, the light in the room was all wrong but I was in a hurry).


It didn't really look yellow at all, actually it was a very very pale cream.  It had Cocoa Butter and Apricot Kernel Oil and I superfatted it with the best smelling Coffee Butter ever (like the nicest creamiest coffee you'll ever have!).  It's fragranced with Amber Vanilla fragrance oil which is deep and creamy - a grown up sort of vanilla if you will. 

And here are the cut pictures:

The full tester size soap, before cutting and after demoulding

Cut pictures

Swirl close up

Swirl close up

Smooth sides

All the cut soaps

I trimmed the soaps a little; with the leftovers, I wet my hands and squidged them all together into soap balls which will be handy for the kitchen - this is the bubbles it made on my hands - felt great!

These will need 6 weeks to cure before use - in that time, I imagine they are going to darken considerably due to the vanilla fragrance oil used.  I'll post some pictures when they're fully cured to see the differnce in the colour.

So that's my second adventure in cold process soapmaking.  Stay tuned for more info!!


Related Posts Plugin for WordPress, Blogger...