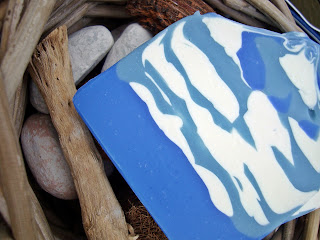
I haven't made a soap in a week (oh Lord, what a calamity!) and decided that I'd make one today; I've not made a blue soap before (bar the Wild Blueberry one which turned a hint of green because the fragrance oil turned the batter yellow!). I wanted a nice calm, clean, cool blue and choose a cool cotton fragrance .... it smells like freshly washed laundry blowing on the clothesline on a summers day, really lovely.
As some of you will know, Titch (my honorary daughter) has developed a strong interest in photography and decided to take pictures of the soap making process .. she even threw in a short video too. Actually, I've never really taken a video on the camera before but it worked really well! But I'm running ahead of myself.
So, I thought it'd be great to do a whole blog post on the making of a soap for those readers who don't know how a soap is actually made. Beware, this is going to be MEGA pic heavy!!!
So, here we go.... we're at the point where I've melted all the butters and oils and I've prepared the water & lye and dissolved the silk so we're ready to go and MAKE SOAP!
Here are the butters & oils all melted and I've just added the fragrance oil in and I'm stick blending it a little just to make sure it's fully incorporated
The jug contains the lye water which has the silk dissolved in it and I'm carefully pouring it into the melted oils/butters, stirring with the stick blender as I go
The stick blender is just mixing the lye into the oils ... you can see vague whiter whisps in the mix, this is the start of the lye reacting with the oils - the stick blender is whirring away at this stage
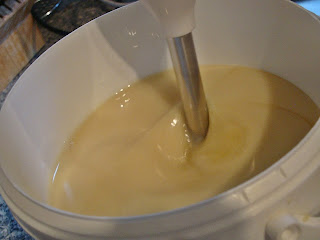
Still stick blending and you can see the mix becoming more and more creamy as the mix comes to the point of emulsification
Still mixing - the oil is being mixed in more and more as I stick blend
Almost there!
Hardly any oil left now
A nice shiny pretty creamy trace! Yay, this is what I want to see, nicely liquidy still and shiny and lovely - I stop stick blending now
Here, I'm dividing the soap batter into 3 jugs - one for each colour; the spatula gets out every tiny little scrap, waste not want not!
Pre this picture, I had mixed three colours - one dark blue, one pale blue and one white; I poured the soap batter (as you saw in the previous picture) equally into three jugs, one for each colour. This is the white titanium dioxide mix with the creamy soap batter
The titanium dioxide mix pre mixing
Here, I'm adding my ultramarine blue to which I added a little glycerine so I could mix any lumps out of it and adding it into the soap batter
The ultramarine blue poured into the soap batter
Mixing the ultramarine blue into the soap - hmmmm, this isn't working... perhaps I should stick blend this?
Oh yeah baby, now that is a pretty stick blended blue!
Here I'm mixing my pastel blue ... again, it might need a little stick blending to encourage it!
Ah yes, stick blended pastel blue... you can see the glisten of the mica on the lip of the spatula
A nice creamy pale blue
Here's my white all mixed up, again this was stick blended to make sure there were no lumps
Very pretty ultramarine blue soap ready to use
Pretty pastel blue, ready to use
And some lovely white ... all three jugs, ready to go
Here's my lined mould, ready and waiting
So I pour the ultramarine blue on the base - I adore this colour
That's 95% of the UM blue in the base, slightly flattened out to make a straighter layer (but not very well, oh well!)
Now I begin to put the rest of the soap out - because of a mix of the stick blending and the fragrance oil, the batter is a little thick but no worries, I love the dollops of what looks like fresh cream - creamy and delicious looking
Some pastel blue and white dollops of soap
Now more white ... the soap is building up
About this time, we started making a little video - very very short but it's our first one...
A very quiet video showing me working on the soap and banging the air bubble out of it
More blue and white - see how shiny the soap is? I love that look!
I've only got a bit left ... I need to think about working on the tops I think
I kept back a little of the UM blue to put on the top ...more dollops again!
I love this picture... UM blue, pastel blue and white ... all layered up
More soap dollops
Here's me putting some of the pastel blue soap on the top of the soap using the spatula (I move to the spatula when I've only a little of the soap left)
Final colours added to the top
Last little bit of pastel blue being added
Now to begin the tops!
How cool does that look?
Look... lots of swirls baby!
More and more top work
The next few pics are of the top as I work on it... I never know when to stop!
So, that's it .. the soap then went into the fridge and it's still there now. It's going to be called Laundry Day and it smells just divine. We might do a demoulding and cutting video now that we know how to do them! Hope you enjoyed the picture and understand more of the process now and thank God nothing went wrong with it!!!
Huge huge thanks to Titch Holland who took all these pictures and the video - check out her Facebook page at
http://www.facebook.com/takenbytitch - she's gaining more experience at the moment but is very interested in working on taking product photos, especially for those who make handmade products so make sure to like her page and keep an eye on her work!
Thanks for reading and make sure to come back and see the cutting pics!


